New Series: Photo Location Ideas In Whitby, Ontario

Welcome to my new series featuring photo location ideas right here in Durham Region!

Starting out with a little bit of history, Durham Region was created on January 1st, 1974. It doesn’t seem like it was that long ago, does it? DR includes eight area municipalities; Oshawa, Whitby, Ajax, Pickering, Clarington, Brock, Scugog & finally Uxbridge. Today, we’re exploring locations in the cozy town of Whitby.

Whitby has it all - a charming downtown core with a thriving food scene, countless walking trails and parks, a beautiful blend of old craftsman style homes and modern properties. The list goes on… But today I am going to focus on a couple walking trails and parks that are integrated within residential neighbourhoods. There are two locations that I will be discussing, as well as sharing pictures of each so that you can begin to imagine how your pictures will turn out.

Image courtesy of Whitby.ca

Fallingbrook Park

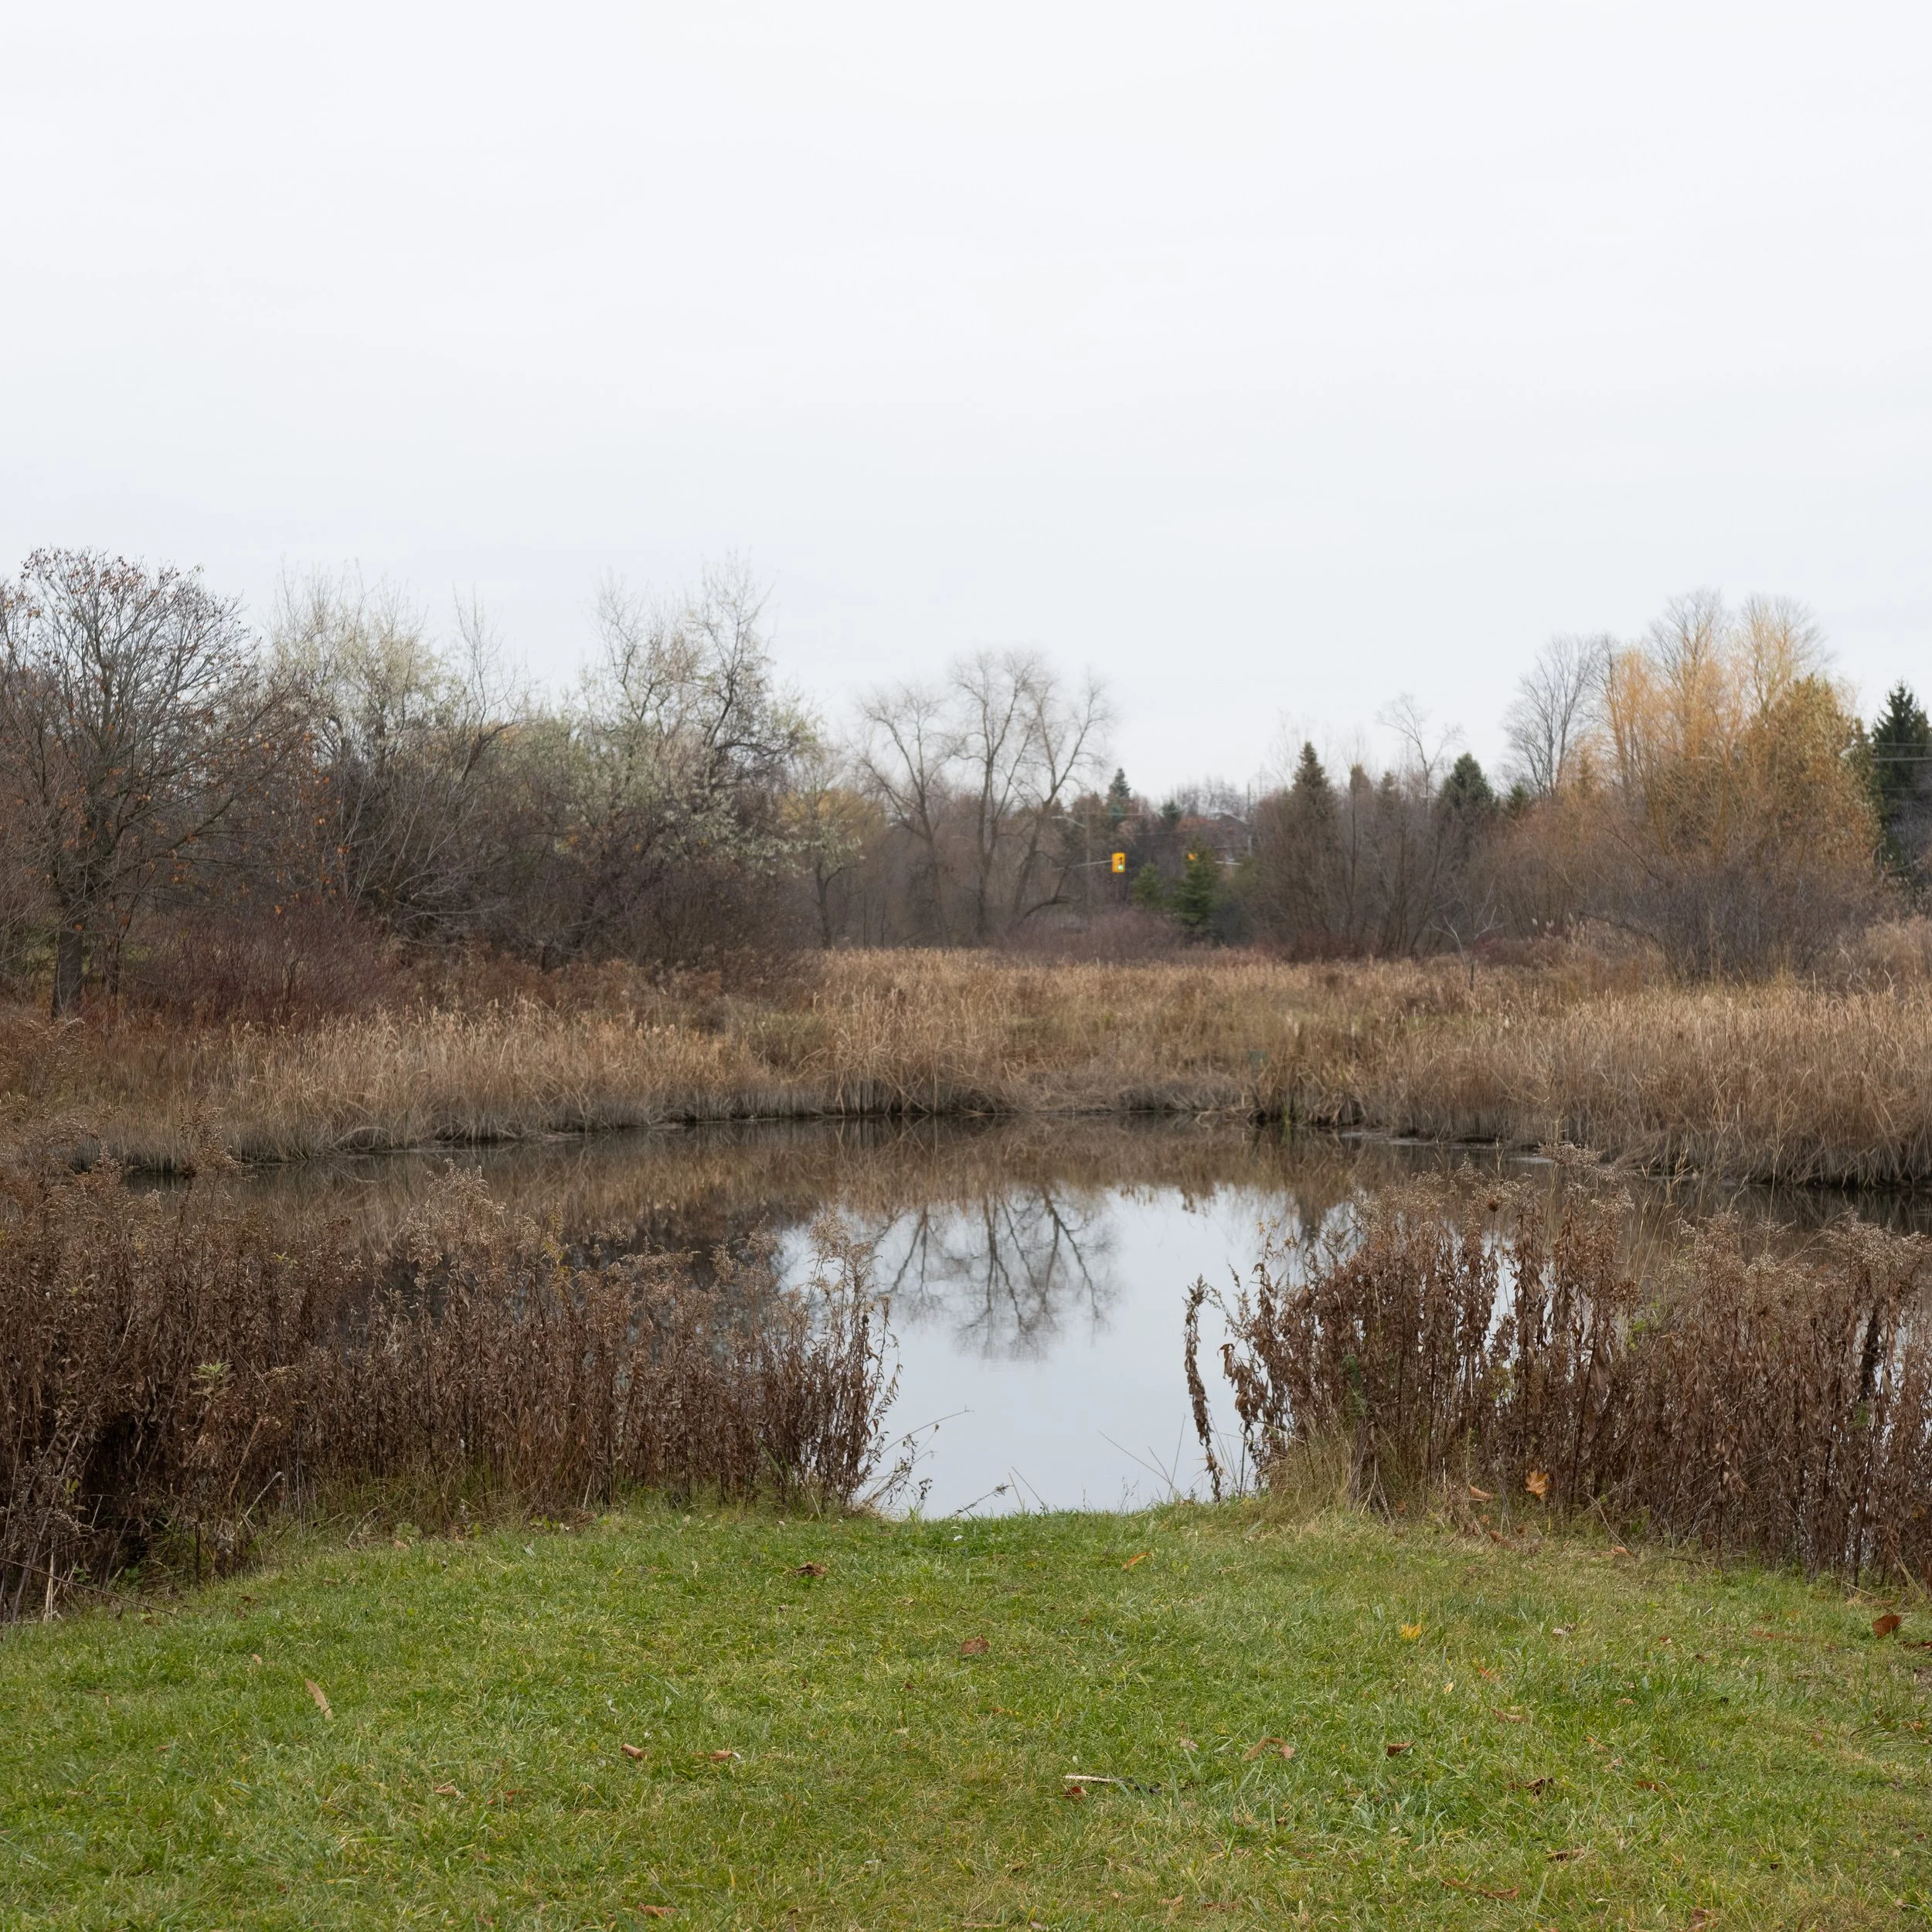
Fallingbrook Park is located alongside Anderson Street and Rossland Road at 25 Fallingbrook St. It offers a play space for children to play, a large soccer pitch, beautiful weeping willow trees and a quaint ponded area.

We will be focusing on the area that edges along Anderson street and Rossland Rd. because it has better picture potential. This stretch of land houses the pond, tall grass and weeping willow trees. Imagine capturing winter’s snow-kissed weeping willows, falls kaleidoscope of colour and the lush vibrancy of summer right in your neighbourhood. It’s a photographers dream!

If you’re getting here by foot, you’ll get to enjoy a nice relaxing walk through the friendly neighbourhood. The residential roads aren’t usually too busy so you can walk in relative peace and quiet. It’s also a very dog friendly area, so don’t be surprised if you end up petting a few cute dogs on route to the park.

Your journey to the park however can start from two different entrance points. The first point of entry, if travelling from Anderson St. is via the small bridge directly parallel from the traffic lights. The bridge crosses over a narrow body of water that travels up toward Rossland rd. This is the ideal entrance point because its path is shorter to the pond, and immediately upon entry there is a beautiful and strikingly tall weeping willow tree. The second (or first point of entry for people travelling by car) is through the parking lot. It’s adjacent to a Public School, so consider travelling here on weekends when it’s less busy. For those that are walking, you can reach this spot by walking via Fallingbrook Street towards Rossland or Taunton.

There are many spots within this one park that offer up many photo opportunities. I can say that even the simple tall grass can easily take up an hours worth of pictures. Your pictures will not be boring here. In fact, it will only serve to inject more creativity into how you pose your subjects. You can accomplish a lot with just one area. Enjoy it in every season.

Here are some reasons why you’ll love photographing here:

  • It’s quiet (its far enough away from the main road that the noise isn’t piercing)

  • The reflections in the water are crystal clear because of how still the water is

  • The long and flowing tree branches can be used to create stunning foreground blur

  • When the sun sets, it shimmers through the trees and casts beautiful shadows on your subjects face and body

  • The weeping willows retain, well, their weepiness in the winter. So when snow falls on them, its spectacular!

  • It’s beautiful in all seasons

To inspire your next photoshoot, I’ve shared some photos I took at Fallingbrook Park below

Hydro Corridor Trail

This is the longest trail in Whitby. It extends between multiple major intersections and neighbourhoods, ending its trail at Longwood park. But today we begin and end our trail from Dryden through to Rossland. Although I will be covering a short area of its actual distance, there is still so many pockets of picturesque spots that are worthy of attention.

Image courtesy of Whitby.ca

We’re starting our journey at Dryden. From here you can choose to go either right or left. Both of which travel to a busy intersection but along the way, you will find many photo opportunities. Today I’ve chosen to go right towards Rossland. This area has a bridge that crosses over a small rocky area with water flowing through it. It’s beautiful in the summer and magical in the fall time. For the most part, it’s not a busy area so if you wanted to take a pictures of friends or family, or even of yourself, you’d be mostly uninterrupted.

This trail includes a pathway which is shared with all types of pedestrians (bikers, runners, skateboards, etc). Just be mindful that if you’re using the path consider that pedestrians might enter into your shot accidentally. It’s important to remember to respect the privacy of others and only take pictures of your clients or of yourself.

The hydro corridor is open to the public 7 days a week, 24 hours a day. You can visit all throughout the year and enjoy it in all its seasons. My personal favourite is in the summertime when the leaves are lush, the grass is green and flowers have begun to grow. During summer, I especially love golden hour - the way it pierces through the hydro lines and structure. Stunning. Also included as a favourite is visiting in the fall time when the leaves have begun changing colours. It adds so much dimension to an image. I just wish it didn’t have to be cold when taking the picture!

Below, I’ve included photographs of the hydro corridor trail. You will get a better idea of how the area looks and can begin to imagine your future photoshoot here. There is much to like about this place and I don’t think you will be disappointed in the portraits you’ll end up capturing.


A Fun New Photography Game to Play at Your Next Event

Have you recently been hired to photograph a large event? Are you nervous about being around large crowds? And do you feel as if large crowds will somehow affect the quality of images you produce? 

I've been there. A few times, actually and it can get a little stressful. But fear not because I have come up with a game YOU can play to restore your self confidence photographing large crowds. It's called Hide-and-go-snap! 

Hide-and-go-snap is a fun and quiet game that you, the photographer, play when you're photographing large events and also small ones too. You simply hide behind and against things or people which can include the following;

  • walls (my favourite!)

  • doors (oh gosh, these turn out gorgeous)

  • tables

  • chairs

  • windows ( I love this one, the reflections from windows are stunning)

Renita+and+Sascha+Engagement+Party+185.jpeg

The benefits of playing:

  1.  Your pictures will look more professional. Because you're photographing people that don't know they're being photographed, you'll produce more authentic expressions. Authenticity mixed with foreground blur in your images is great when you want to make the picture personal to the subject but retain professionalism. Foreground blur is pretty much always a good idea. 

  2. You'll have fun and gain confidence. Photographing from secret locations that no party guests are visiting or hiding behind walls or windows to capture a fun moment is fun! Not to mention it's also quiet. When you're just starting out the event, naturally you'll get a little nervous. So when you hide away for a little bit to observe the event, you'll loosen up, take pictures behind things, look at how nice it turned out, feel a sense of confidence then sooner or later you'll find yourself photographing in plain sight! 

How to Instantly Improve Your Event Photography

Hey everyone! 

Glad to know you're reading. And I'm also happy you choose me to learn from! You're going to learn exactly the same techniques I use when I photograph events. And you'll be able to implement those quickly because all of what I do is pretty simple but the results are amazing!

I wasn't always good at photography but I became better each time by looking at other peoples work. This would become my  inspiration and photo techniques. I would study their picture and figure out where they were standing, the angles in which they took them, the distance they photographed from, etc. Then I review the information of the photo and that's how I came up with my own set of techniques/ideas below! 

1. Stand behind people/things

This technique is my favourite during events. It's a simple trick I use when there's lots of people around. I'll point my camera into a concentrated area of people and I'll quickly look for someone right in front of me to use as my foreground blur, then I look for someone that is either significant to the event or someone who stands out in the crowd. Now is when I focus on this person and snap my photo. But before I snap, I wait till I see them with a smile or other positive expressions!

The benefits of standing behind people and/or things are; 

  • You'll create a visual story. 

  • You'll be less noticed by guests and it'll be much easier to capture authentic expressions

2. Photograph all the details

I love photographing the decorations at events. It's always beautiful and it's great for your clients to look back on and reminisce about all the details of their event. It's special memories for your clients to cherish for a very long time. That's why its so important to take all the pictures you can of the small intricate details. Sometimes people are busy having fun and miss out on those details.

When I take pictures of the tables, decor, centre pieces, etc, I make sure that I'm using my 50mm 1.8 lens. It's my favourite, favourite, favourite lens!! It lets me get in a little closer to my subjects and has a beautiful blurry background that I love so much! Use a steady hand to take your picture and be aware of your surroundings because you don't want people in the background. Sometimes it's not possible but try to get photos of details without other people.   

The last and most important thing is to edit. I use Rooke & Roover Camera Raw and Photoshop. You can also use PicMonkey.

If you try out these techniques/ideas for your next event, you'll see a dramatic difference in quality of image. This will easily transfer into confidence behind the lens. 

Good luck,

Jessica.

Thanks for reading!

How Your Favourite Movie Can Improve Your Photography

It sounds crazy, but it's true. 

Videos that you watch are made from thousands of pictures that capture every movement of your face as you make them. Every film you watch is essentially millions of pictures being played out to you. Composition is an integral part of cinematography. The placement of characters and their backgrounds are essential to the look and feel of its situation. The cinematographers responsibility is to frame each scene like a picture. So you could learn some very important basics of composition just by watching your favourite film. 

Let's get started

The first thing you should do is pick your movie. I choose Mad Max: Fury Road

Subscribe to TRAILERS: http://bit.ly/sxaw6h Subscribe to COMING SOON: http://bit.ly/H2vZUn Like us on FACEBOOK: http://goo.gl/dHs73 Follow us on TWITTER: http://bit.ly/1ghOWmt Mad Max: Fury Road Official Final Trailer (2014) - Charlize Theron, Tom Hardy Movie HD A apocalyptic story set in the furthest reaches of our planet, in a stark desert landscape where humanity is broken, and most everyone is crazed fighting for the necessities of life.

While watching the trailer, I noticed these compositional techniques..

1. Rule of thirds

This fundamental technique is used in most films you watch. By simply placing your subject off centre from the right or left of an image, you create a composition that is visually attractive to most people.  The thumbnail video image is a good example. 

2. negative space

The area around your subject, usually empty, is negative space. For example, Charlize Theron (Imperator Furiosa) kneels down in the dessert. The cinematographer is far enough to create a large negative space around her, which gives you the impression that she is alone. 

3. Fill the frame

This refers to making your subject the significant portion of the photograph, usually centre to the frame. For example, Nux is filmed while driving inside the vehicle and his face and upper body is the majority of the image or scene. 

4. framing

Framing is using objects to frame your subjects. An excellent example is the scene with Tom Hardy (Max Rockatansky) hiding inside the trucks floor storage. The outline of the door around him help create the frame. 


4 Very Genius Food Styling Tips For Your Next Shoot

Do you want to learn some very cool food photography tricks?

I bet you do! 

Have you ever wondered how the top food photographers make their dishes look so mouth watering? I've wondered the same thing. As a regular consumer of food, I know it almost always never looks like what it does on the internet or television. So, how exactly do they do it? What are their secrets? 

I'm not here to tell you something you already know. I want to tell you about all the food styling tips you never hear about. I want to give you the knowledge of knowing how that dish made steam, or how they made those water droplets and much more!

I've included a few of my favourite food photographers in the links in this paragraph. Clinton Hussey, a Vancouver based commercial photographer is a perfect example of striking food imagery. Foodie Photography, Annabelle Breakey and Maya Visnyei are three other examples of very skillful individuals worth getting to know. Their work is inspiring.

Food Styling Tips For You!

1.  Glycerin Water Droplets

This is a cool trick if you want to create fake water droplets that won't evaporate (as quickly)! The recipe is simple. 50/50 parts water and glycerin. Use more or less of the ingredients, if you choose.Quick tip, you can create tiny droplets if you spray close to the bottle, or if you want bigger drops, spray farther. 

Triptych3.jpg

2. Make Steam with Cotton

You can make fake steam emerge from any dish with a carefully placed cotton ball. All you have to do is soak one or two cotton balls in water and microwave it for 30 seconds.

3. Make Your Cake Sparkle

Sometimes cake can look dull and dry, to fix this problem, food stylist use hairspray to spark life back into it. It's very simple to do, it's just spray until you are satisfied with the result.

4. Use Mash Potatoes for Ice Cream

Ice cream melts but mashed potatoes don't! They both have similar textures and you can dye mashed potatoes any colour to look like an ice cream flavour. The best part is that you can photograph potato ice cream for hours!

I hope you have enjoyed these 4 clever food photo tricks and that in the near future you use them to produce extraordinary photographs.  

Helpful Tips For Your Motion Picture Film

Do you like to film stuff? Are you good at filming stuff?

If you said yes, then please read on. You'll find this tutorial to be helpful and inspiring. So grab your DSLR and your tripod/monopod (or steadicam) and have it ready. Because at the end of this post, you'll be planning and going out to shoot your own motion picture film you can show off to your friends and family.

Before we start, we should talk about your theme of choice. Are you looking to do funny, scary, sad, adventurous? Do you want to send out a message at the end? Whatever you decide, you need to make the necessary planning to achieve the look and feel of what you're looking for.

In order for your film to work out, you need a very solid plan and schedule. Take the time to properly plan your entire production. It will save you time, energy and money. Speaking on the topic of money, it's a good idea to set up a budget if you do plan to spend. Typically, budgets are fixed amounts. Too often things can get over-budget very quickly, so plan ahead. 

There will be some challenges with this movie but once you're finished with it, a flood of nice emotions will lighten you up! 

Before we begin, get paper ready so you can write your ideas as you read.

1. Film it slow.

It sounds unusual, yes. But there is an explanation. Filming a scene slowly grabs as much details from the scene as possible. It also creates a less confusing and rushed atmosphere. 

The best way to film something slowly is to use a steadicam. It will glide your camera smoothly across your scene. If you don't have a steadicam, you can build one yourself. I have posted 2 of my favourite Youtube diy steadicam tutorials below. 

2. Give it the Cinematic Look

Cinematic looks are much warmer and deeper. It makes it look less "filmed straight out of camera" to a more intense experience. 

Just as important, you should change the aspect ratio. Change your composition to 1920 x 800. Click on the links below for more details. And go here to read about it.

3. Keep Dialogue to Minimum.

Words will carry more weight when actors/actresses speak less. Of course that doesn't mean you have to turn this into a silent movie, your characters can talk. Personally, I just think you can absorb a lot more information from a scene when less is spoken.

Well that's it for tips

I had fun writing about this topic and I hope you took something away from this to help you create your movie. Now, all you have to do is plan out what you want and how you want it filmed. Work really hard to plan it out and make that schedule. Work hard and have fun.


How to take beautiful pictures of flowers

Would you like to learn how to take beautiful pictures of flowers? Of course! They are the easiest to photograph and you can have fun doing it too. 

Floral photography is very beautiful. It's a relaxing type of photography because it doesn't talk. You have complete creative control. And some flowers smell really nice! There is literally nothing bad to say about floral photo taking. 

It's only a pleasure to photograph.

Now onto, how to take beautiful pictures of flowers. It's quite easy, you see. The first thing you need to do is to go outside. Maybe it's your backyard or you're walking in the streets of downtown. It is now your mission to find a beautiful flower. The funny irony about this is, you can find a pretty flower in the most ugliest place, or vice versa. Where ever you do find it though, just make sure your camera is ready.

Now, it's not terrible to use your smart phone to snap a picture because they've come a long way from low pixels. Smart phones are quite remarkable in its photo quality these days. Sometimes you aren't able to tell the difference between phone and DSLR's images. So yes, you can use your phone. It has colour editing software for enhancements. But for most of the time, a DSLR is the way to go. 

So now that that is ready, you are now able to take your picture. I use the "no flash" setting on my camera but you can use whichever setting you are comfortable with. Sometimes I experiment with different settings because I want to familiarize myself with them. I'm guilty of having no knowledge or lack of knowledge with at least 60% of the camera settings. It's sad. I wish I knew more but whenever I try to at least learn how they work and what they mean, I just get lost and very confused. But don't worry, I'll try again and again and again, until I know. 

It's important to get the framing right. Composition applies to every type of genre. It enhances the photo and gives your picture the balance it needs. There are many kinds of ways you can frame your picture. I will list the ways in which you can achieve them below:

Rule of thirds - This rule places the subject 3 thirds into the photo. Left or right. It's great if you want to include part of the background into your shot. Just make sure that the background is blurry. 

Fill the frame - This rule places the subject fully into the cameras frame. Every detail is focused on the screen. It is different from a close up but that can depend on the size of the subject.

Lines -  This uses "leading lines" in a photograph to draw the human eye along the lines, whether they be, curved, straight, diagonal or otherwise, through the photo.

Try these "rules" out and see how it works out for your photography. You might find that you enjoy using the rule of thirds (it's my favourite) or lines or which ever! It's important to test out different angles because that's the only way you'll know if something works or not. 

The next very important part of floral photography is editing. Of course, you took a very well framed photo of your flower but your camera makes it look dull. It needs a little something extra like colour enhancements and contrast adjustments. Maybe a little sharpening up. It all depends on what you think it needs. I bought photoshop actions a long time ago and it comes in handy anytime I need quick editing done. I bought actions from a designer that created very dreamy and bright actions sets and it really does spark up a photo. These actions from Phlearn are beautiful too! If you are using a smart phone, you can probably find a photo editing section in  your photos folder. I know that iPhones have a great editing software included inside.

So if you completed all of my tips then you're well on your way to a beautiful image of a flower! It really is a simple and relaxing genre of photography.  

Writing with LIGHT Photography Tutorial

I've seen plenty of tutorials all over the internet, especially on Pinterest, about writing with light using your DSLR. The idea is about taking your DSLR and using the slowest shutter speed to capture hand written words spelled out using a light source. This idea seems so cool, I just have to try it! 

You're going to need four very important things to make this project successful.

  1. A tripod

  2. Glow sticks (or flash lights)

  3. A person

  4. A DSLR

You will need a tripod because you need to keep the image as stable as possible. This ensures a more crisper image and you'll be better able to read the words. You may be able to do it handheld but you must have super stable hands. 

Secondly, you'll need a light source. I chose to use glow sticks. They come in all sorts of different colours so you have a variety to choose from. Why not pick your favourite colour? These glow sticks are about 1 foot tall. I just felt that it would give me a better grip and better colour. I don't know if it will help my cause but we'll find out.

Next you'll need to find someone who will be willing to write a few words for you. Just make sure they know how to spell! My advice to you is to pick out easy words or let them spell out their own name. It will be fun for them and fun for you! 

Finally, for the last and most important piece of the puzzle, your DSLR. You will need this to capture your subject and their handwritings!

How to do it

Note* I suggest you complete this project at night. You will achieve better colour.

The first thing you need to do is to set up your tripod. Depending on the height of your model and the design you want them to draw, you can adjust the height on the tripod. You should also try to find stable ground to place it on. An unstable surface makes it more likely to tip over.

Next thing you'll want to do is secure your camera onto your tripod. Make sure to secure it tightly so you don't risk your camera falling.

Now turn your camera on and switch to Bulb Mode (if it's not already on that dial). It's an incredibly easy setting to use. All you have to do is click to shutter and release it when you want, allowing you full control. You also have control over the ISO settings.

Now go crazy and have fun!

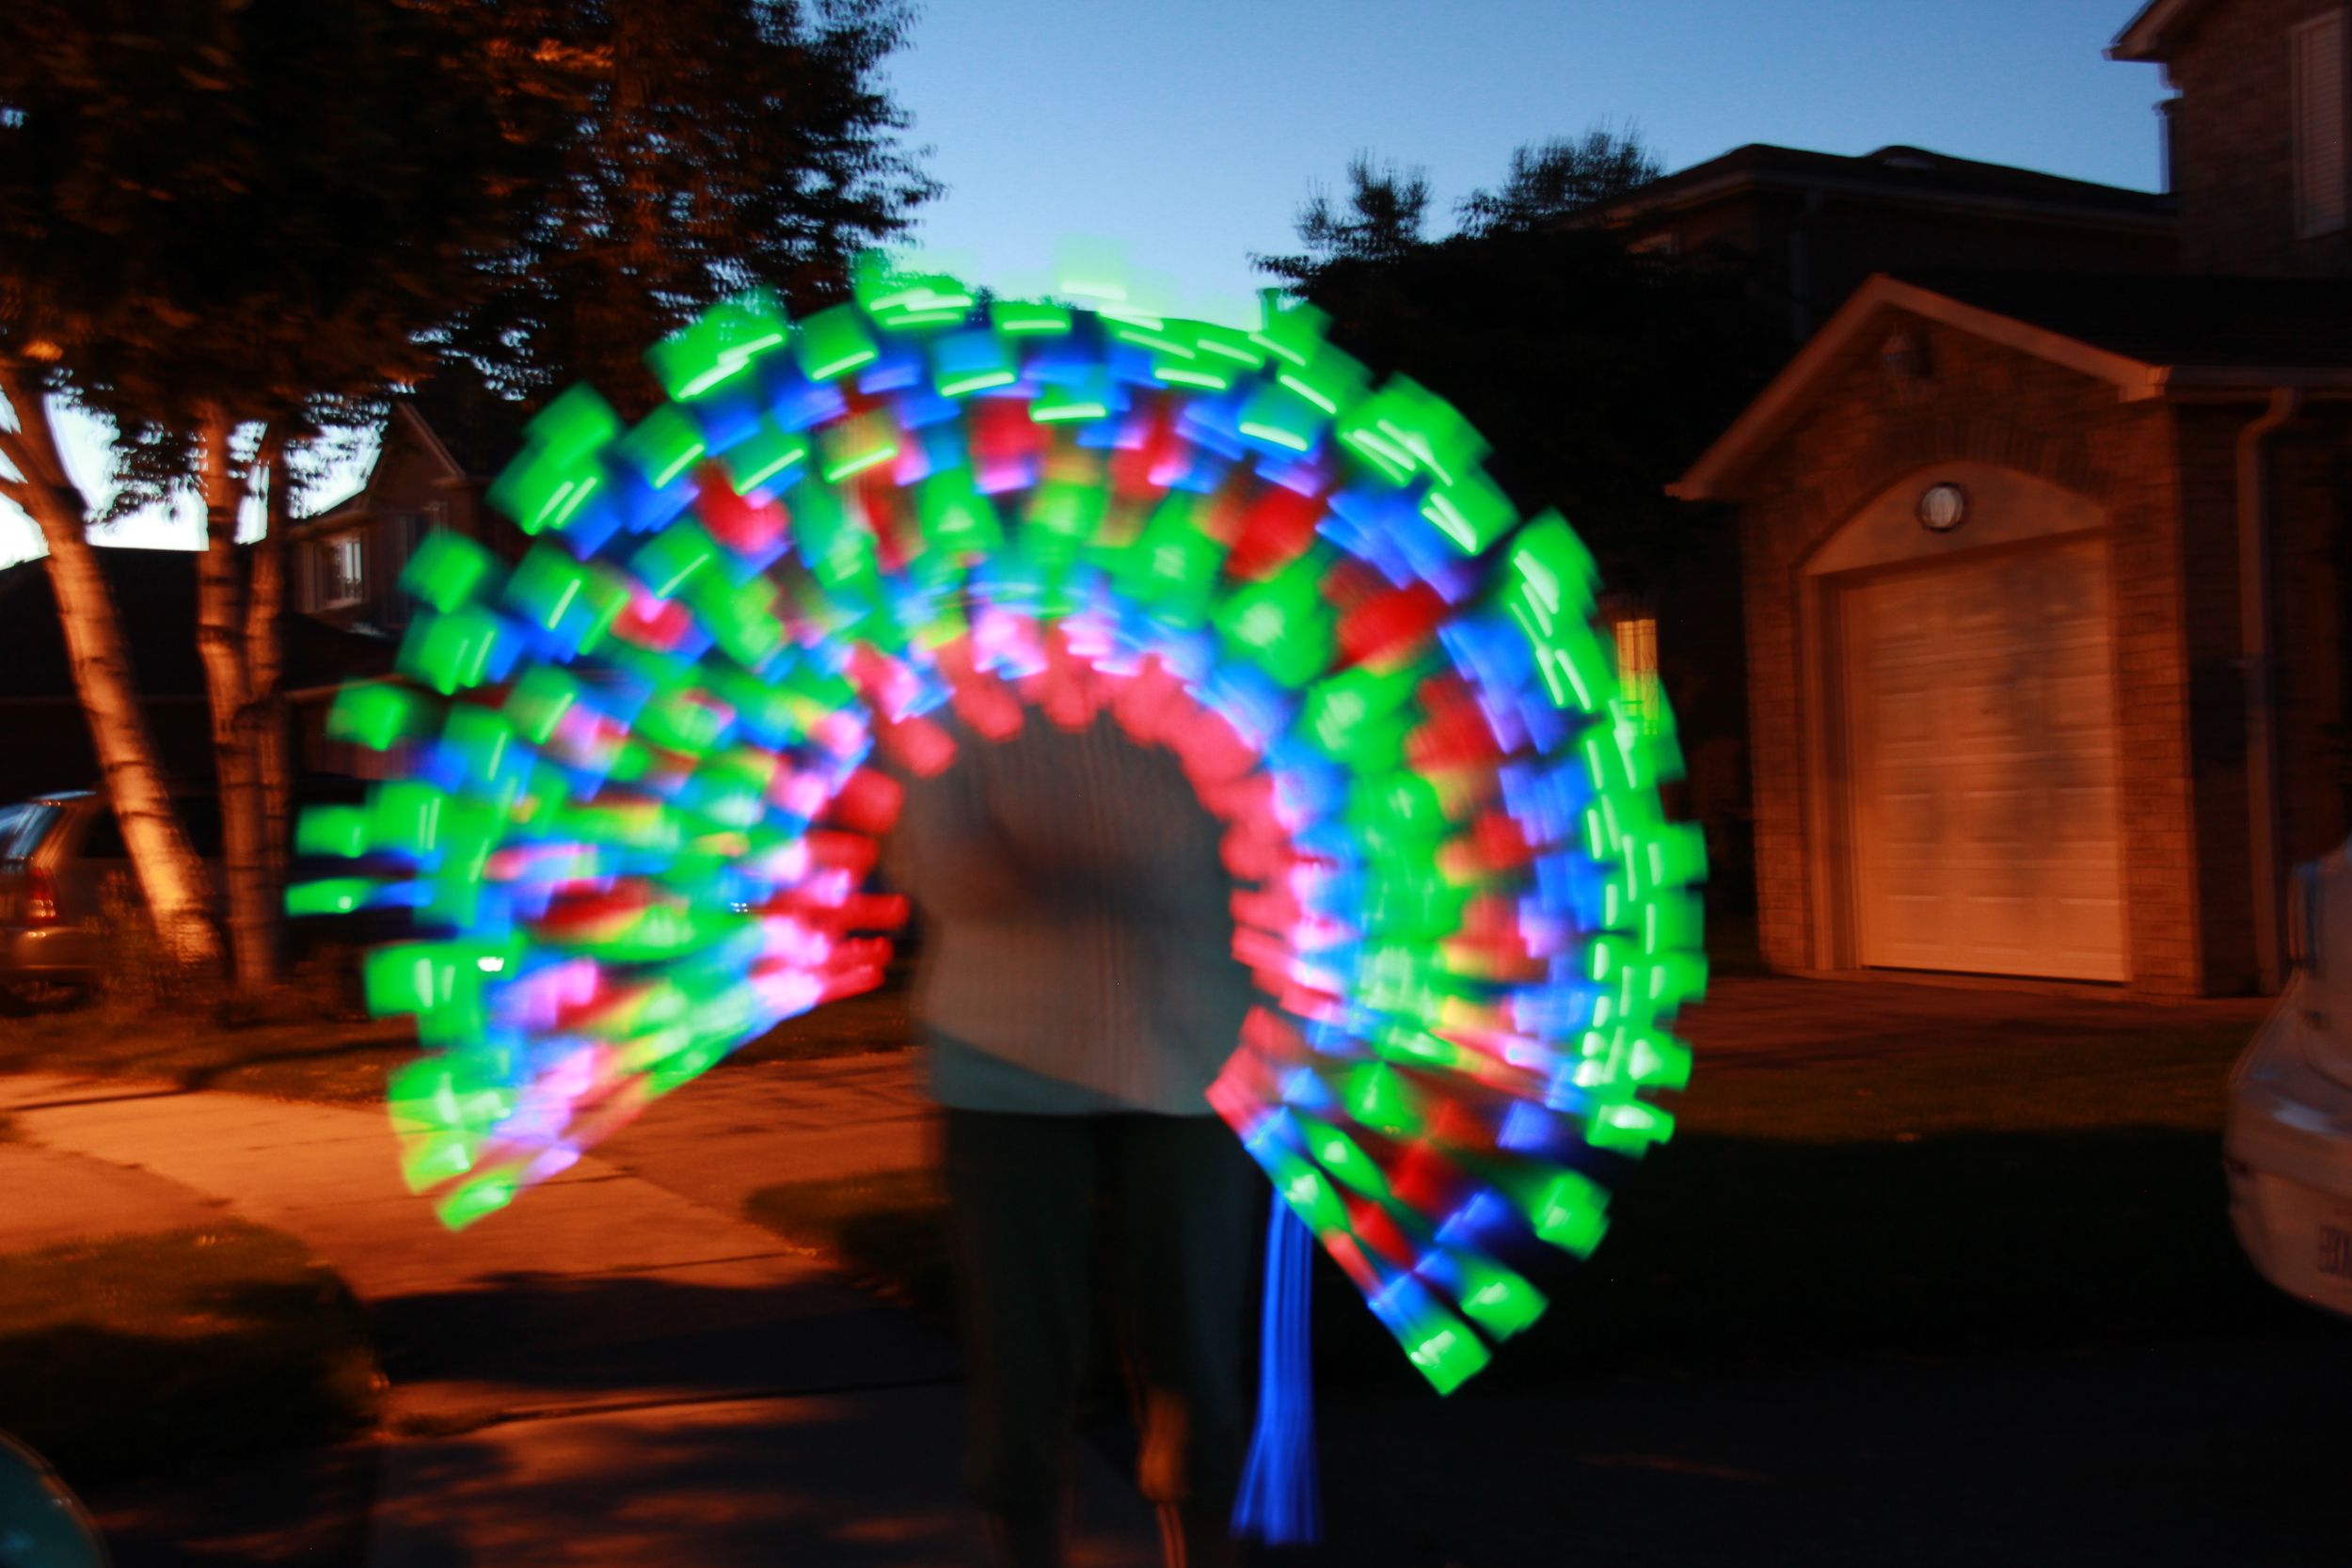
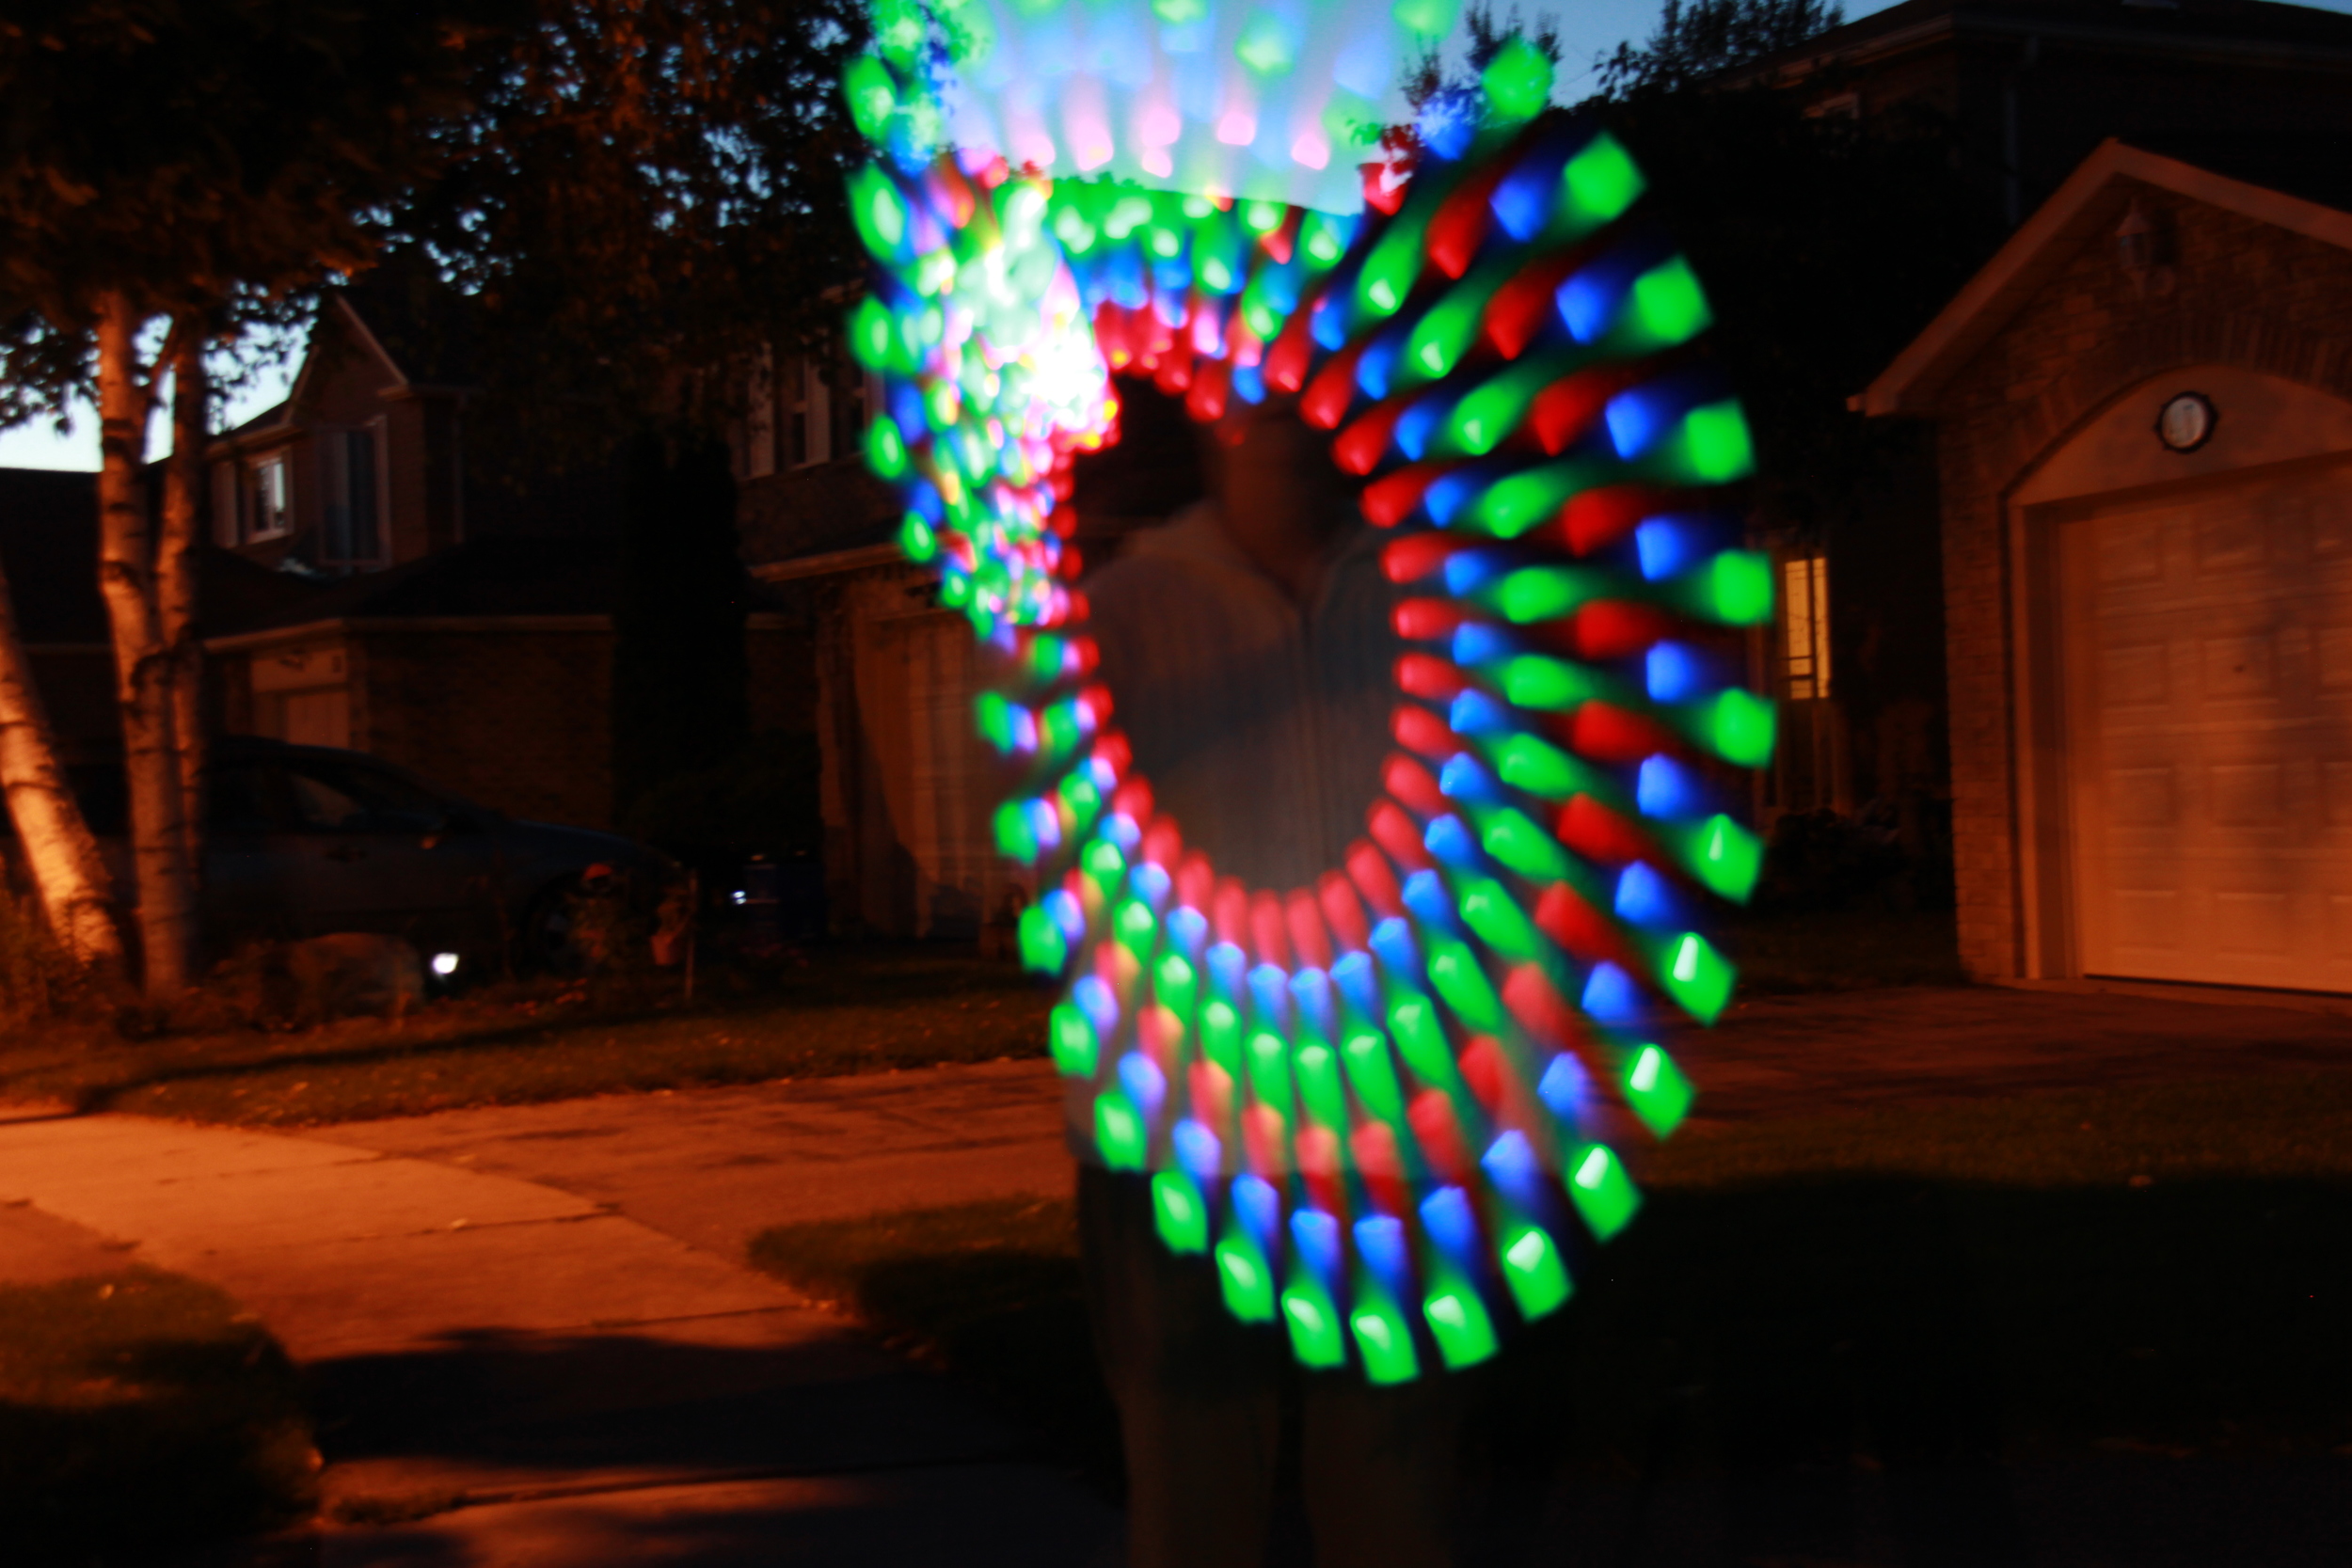
In conclusion, this way a very fun photo project! Obviously the images need some sharpening up and a better background but as a first time project, it turned out pretty well. In case you haven't noticed, the lights you are seeing are from my light sword. I tried using the glow sticks but it come up too dark on the camera. 

So tell me. Have you tried this project? Did it come out similar to mine? Did you run into any problems and how did you fix them? Tell me! 


Awesome Photography Jokes to Make You Giggle

I went on an adventure. An adventure through the internet to find the best photo jokes. I think I succeeded!

In my mind, I thought I was going to find only a few but NOPE! There's so many good jokes I have to share. But before I do that, I have to make sure you're listening to music while you're reading these! You'll totally enjoy the jokes better when you're listening to a good beat.

Now, what's a good song?

Gosh, I love so many :o

Currently I'm obsessed with Omi - Cheerleader. SO obsessed. It's one of those songs that raises your self-esteem and relaxes you. You're just gonna feel so great!

Alright, let's get on with these jokes. We'll start with the one-liners. 

  • I had to give up my career as a photographer. I kept losing focus.

  • A friend of mine is always going on about photography jokes. You can't shutter up!

  • Photography is a developing hobby.

  • I think my pet crocodile is an amateur photographer. He's a bit of a snapper!

  • Sometimes it's tough being a photographer. You have to deal with a lot of crop!

  • Stop being so dramatic, Carmen....You think you're the only one who has hot flashes?

  • Your camera takes really nice pictures! Thanks, I taught it everything it knows... 

  • "A group of artists are invited to dinner by a famous chef. In greeting the photographer, the chef comments: I love your photos, they're wonderful, you must have a very expensive camera. The photographer doesn't reply and walks into the dining room. After dinner the photographer approaches the chef and says: dinner was sensational, very exquisite flavours, a true work of art, you must have a very sophisticated stove."

  • Photographers are very mean. First they frame you, then they shoot you, then hang you on the wall.

  • My wife said if I took one more photo of me she'd leave me. That's when I snapped.

  • Two old guys in raincoats are in a dark alley, watching a pretty girl walk by. One turns to the other and says, as he holds the edges of his coat, "In this dim light, what exposure do you give it?"


How Not to Edit

This post is being written to express my dislike to some outdated photoshop editing techniques still being used today. 

It just breaks my heart. Okay, maybe not. But I hugely dislike it.

You've seen editing like it before. It strikes you but not in a good way. It's as if some people are stuck or want to be stuck in the 90's way of editing. There's been huge changes to the way we edit in the last decade. You know why? because it looks better. 

So I have created an example of an outdated photoshop edit vs how they should be done. 

I hope you learn something from this.

Let's begin..

 Intense Vignettes aren't cool anymore 

Vignettes, when used properly can look good. But, emphasizing it intensely can ruin the image. Keep the image simple and crisp. Use the adjustment layers, such as, brightness/contrast, levels and curves. And if you have some colour in your image, (in this case, the blue deck) use the selective colour tool. 

Keeping things simple works best. It's not overbearing. And you can enjoy smaller details in the image better. 

So say NO to intense vignettes! 

DIY IPhone Photo Projector - Easy as 1-2-3

I know what you're thinking. I know exactly what you're thinking.

You're thinking that this is the coolest thing you've heard about!

It's really cool.

I mean, you can make your very own home made projector. And it's not going to cost you a single penny. Well maybe $1. For the magnify glass. That's nothing!

I pretty much had the same reaction as you. First that's it's pretty cool and second, that it literally won't cost me a thing! Luckily I had everything I needed in my house already. 

Putting the projector together took no time at all. In about 20 minutes, I was done and I was ready to start the magic!

Here are things you will need:

  • A Shoe box
  • Box cutter/or scissors
  • Magnify glass
  • Duct Tape
  • And a cell phone

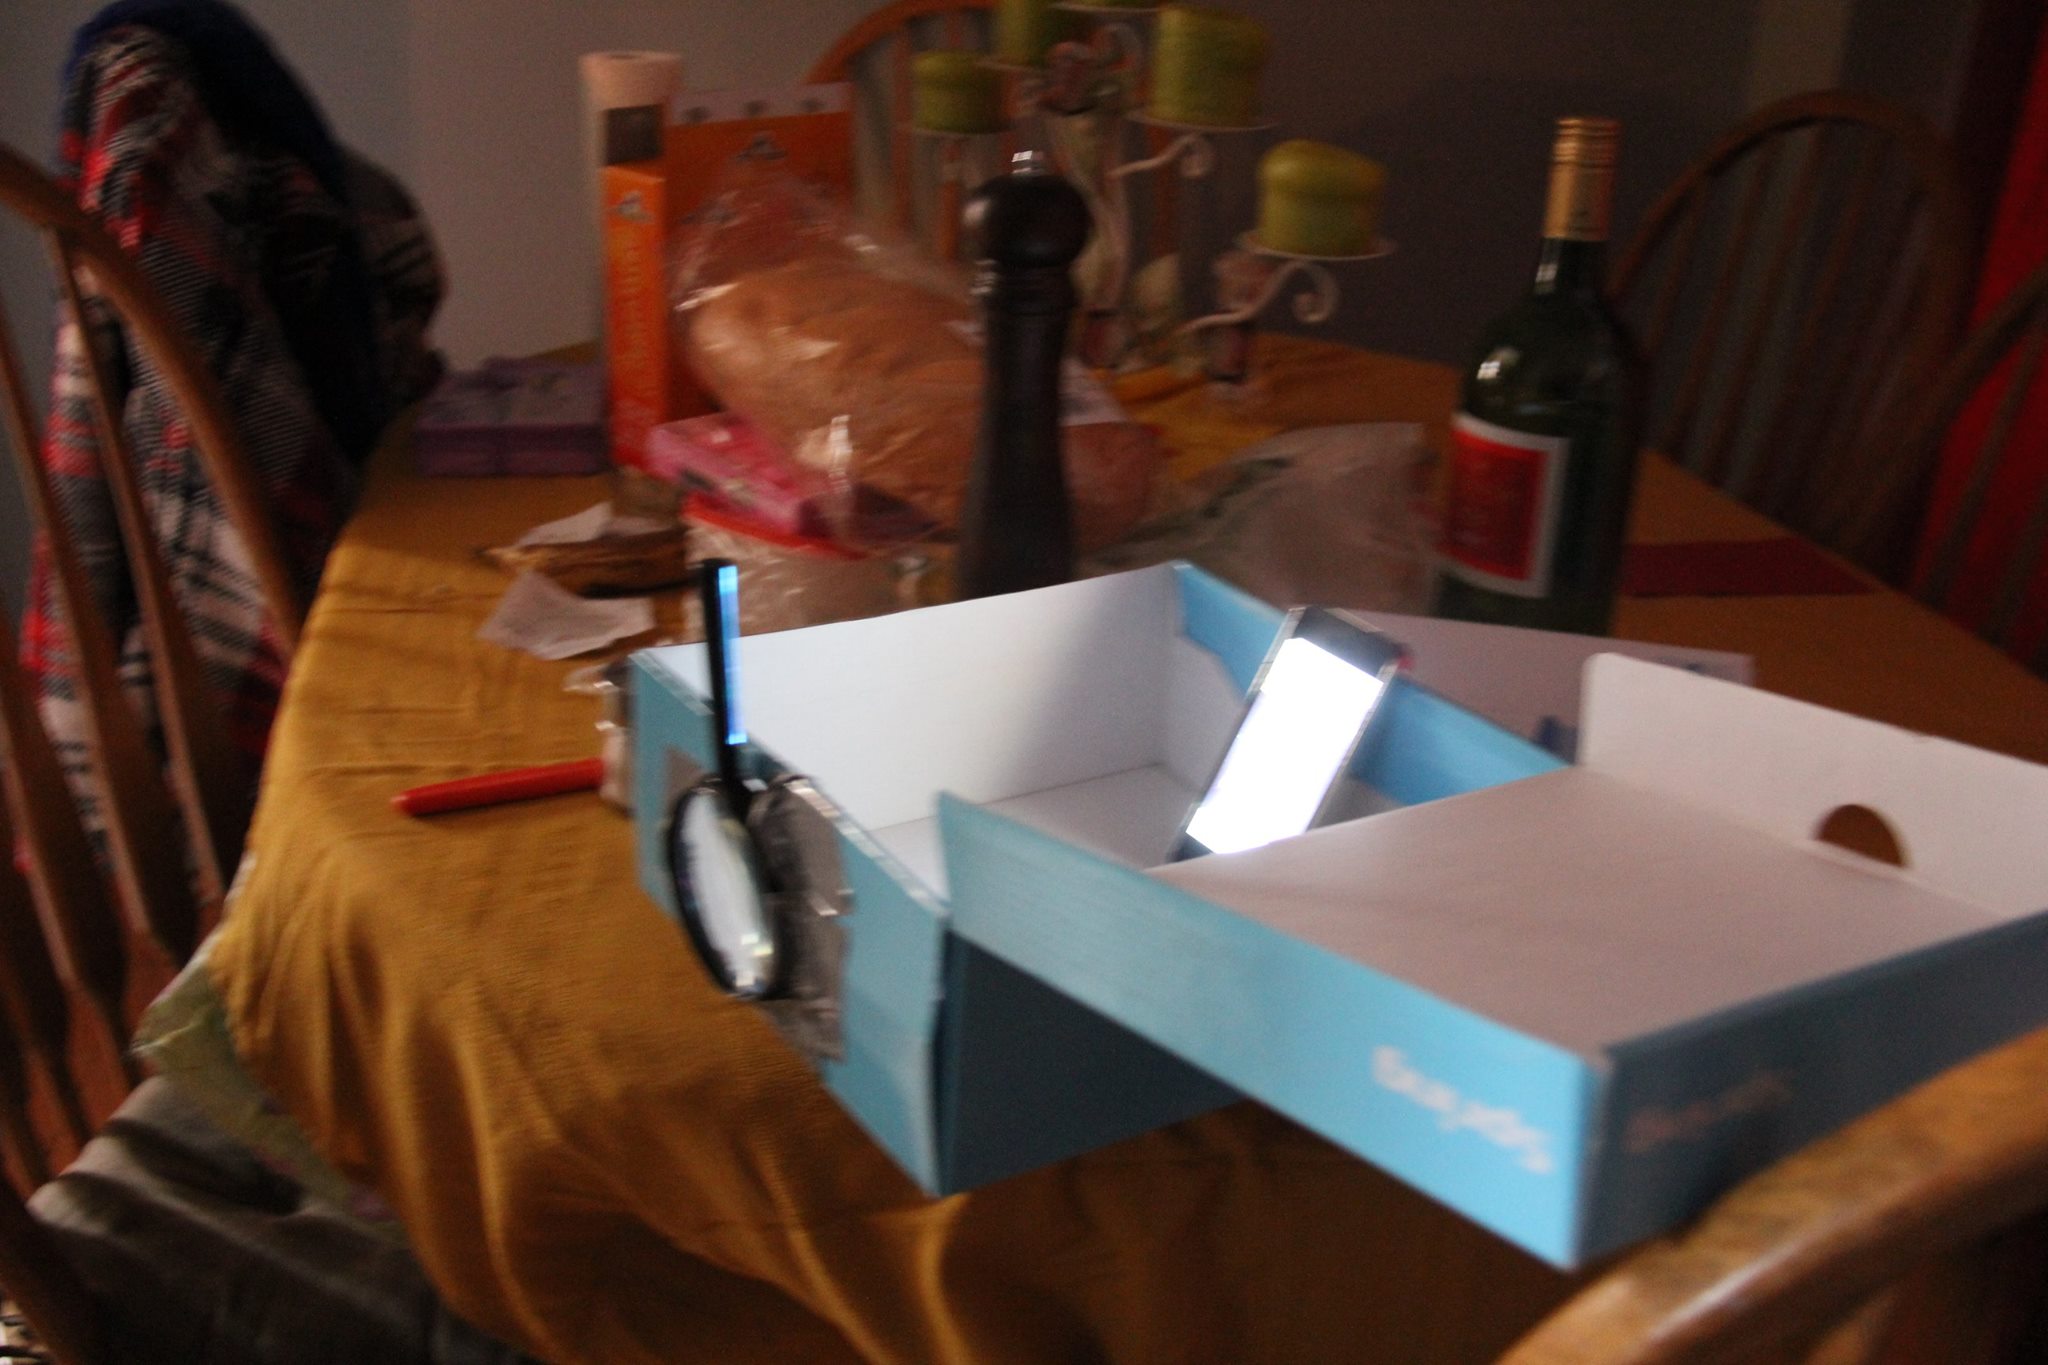
The instructions are simple. Cut a hole the size of the magnify glass onto the shortest side of the shoe box. Using the duct tape, secure the magnify glass. That's really all the labour you have to do with that. But the cell phone was a different story.

I used my IPhone for this project. It really doesn't matter what cell phone you use, as long as you can crank up the brightness, highly important! 

I chose to manually hold my phone. It was easier to focus the image that way. I also had my screen on lock mode so the picture wouldn't switch directions. IMPORTANT* flip your camera so that the image is upside down. 

Now that you have done that. You should now be turning off all the lights, closing the curtains and making sure that the room you are in is as dark as it can be.

Find a wall. Preferably one that has a lighter paint colour and isn't cluttered.

Now point your new projector at the wall. You should see an image!

This is how it looked! It's pretty cool. I was really fascinated doing this. 

So, what did you think? Are you going to try it out?

Leave a comment below! 

My Photography Inspiration!

I love Photography. It's powerful yet simple. Fun yet challenging. It's really perfect for me. I get most of my motivation from fashion photography, reading magazines and looking online inspire my eyes and fill me with creativity! It feels good. So I wanted to share what goes through my mind when I'm in that creative photography mode.

1. I Visualize. A Lot

I think a lot. I visualize a lot about how the shoot will look, what the model will wear, how she'll move and pose, small details etc. I visualize the hell out of it. I don't miss anything. To me, visualizing is my story board. It's literally the best way I organize myself. My advice to you, visualize!

2. I Pinterest and Google Search Ideas

I use the internet to my complete advantage. You can find SO. MANY. IDEAS to inspire you. The thing I most enjoy about these search engines is that you can literally find THOUSANDS UPON THOUSANDS of images to inspire you! You can take (and I've done it) ideas from one photo and  mix it with your own to create your masterpiece. It's awesome!

3. I Look at Magazines

I can find a lot of inspiration looking through magazines that it puts a smile on my face. :) And it's convenient for me to bring to shoots. Just fold it and put it in your pocket! The single ripped image of course! 

4. I Shop at Dollarama

It's ma favourite! Dollarama, is as the title suggest, a dollar store with THOUSANDS of fun and useful things! And candy, yum! I can walk down all the isles that Dollarama has and be inspired by everything. But usually, I'll find myself in the fake flower isle (or wall and the end of the store) and be at peace. All my ideas start flying! 


So, that's me! That's how I think! That's how I process my ideas and get my motivation. I'm certainly glad that I can be so inspired by things that cost a dollar ;) Bye!


Lara Jade - Fashion Photography 101 Book Review

Lara Jade, a high profile fashion photographer based in New York, released her own fashion photography book, Fashion Photography 101. Today I'll be reviewing her book and revealing a few pages with you guys. You will read about my general opinion of her books content so you can make your own decision to purchase. I had received this book as a christmas present from my aunt and was completely taken by surprise! Originally, my mother was suppose to get me this book for christmas but I really wanted a squarespace website instead. So when I unwrapped my present from my aunt, I was pleasantly surprised! I began reading it and was quickly impressed with all the imagery and her editorial work she included in her book. It sparked a lot of inspiration for my own photography.

The book itself is 160 pages, or ten content chapters. She writes about everything from equipment to retouching and everything in between, and most importantly she writes from her own experience as a fashion photographer. 

Reading through the first chapter of this book, I was bored. It was information about cameras, choosing a DSLR and her favourite lenses. It got very technical, very fast. That being said, she made it up with her stunning imagery. That's not to say the information was not useful, it's just that technical parts of photography have always been confusing to me. 

Moving through the book, we move onto the preparation and creative team chapters. This is when the book takes a more in-depth look into fashion photography. She teaches you how to prepare for a shoot, find inspiration, sketch and how to get into fashion photography. I learned a lot in this chapter, including some new terms I never knew existed. Plus, the fashion portraits she includes in this chapter are inspirationally beautiful!

Now we move onto my favourite chapter of this book; shooting. Two reasons why I love this chapter, first is because all her imagery and secondly because of her helpful tips. She gave excellent tips regarding natural light, which is my favourite way to take pictures!

This chapter also includes two pages full of photography terminology. So if you're looking to brush up on some new terms, you'll learn them here.

Chapters 5 (Scenarios), 6 (The Working Photographer) and 7 (Organization) are in my opinion the most important to read. She gives a plentiful amount of information on each subject, and answers a lot of questions you might have. You might have also noticed while flipping through these particular chapters that there is no chapter 6, but two chapter 5's. I guess we're all human.

The remaining chapters 8 (Retouching) and 9 (Marketing), including the appendices still carry value to me, as I get to learn how she retouches and how she markets but I also understand that I have my own ways of doing both. But then again, I did learn a few new tips that I haven't before. Take from it what you will. 

As my overall opinion of this book, I think it's great. It does have its flaws but it also contains content that is easily graspable to the aspiring fashion photographer, extremely helpful tips and you'll learn new terminology to use and understand as your fashion photography career starts blossoming.

Thank you for reading.

How to Customize Bokeh

Ever wonder how they get those different shapes in the blurry background of a picture? Well, I know how! It's pretty simple to do and you'll find yourself taking pictures of everything with a light source!

To create customized bokeh shapes like this, you'll need very few supplies and some creativity!

Things you'll need

  1.  Black construction Paper
  2.  Scissors (for nails)
  3. Tape
  4. Pen
  5. Lowest Aperture Lens you own

The first thing you'll need to do is trace the outline of your lens on black construction paper.

Next, choose a design or shape to draw in the middle. In this case, I choose a heart. 

IMG_7462.jpg

Using your scissors, cut your circle. To make cutting your heart easier, bend or pinch the middle of your heart and cut with scissors

Once all of that is complete, you simply tape your new "paper filter" on your lens. Now turn on your camera to the setting you're most comfortable with. It's really important to use a lens with a very small aperture, an example is the 50mm 1.8. Working with a smaller aperture allows for a more "blurry" background, which will play nicely with this project.  Play around with the focus to achieve a more tight or loose bokeh. And there you have it! It's really that simple! Here are some of my own pictures I took! 

Stars!

Stars!

More Stars...

More Stars...

This was my attempt at making 2015. It didn't turn out too bad

This was my attempt at making 2015. It didn't turn out too bad

Pretty little hearts

Pretty little hearts

Thank you for reading and learning! This project was fun and everyone that I showed this to was so amazed with it, even though it was the simplest thing to make! Now it's your turn to have fun, get creative and show off your new pictures to your friends and family!

How to Capture Beautiful Backlight

There is something so beautiful about sunlight that just makes pictures (and videos) so breathtaking. The way the sun hits the skin, creates a glowing look and outlines details. It's my favourite way to take pictures.

When I first starting taking pictures a few years ago, I never knew about backlighting. My only knowledge of picture taking was clicking the shutter button. I missed out on a lot of golden opportunities but I know how to take them now! I can't remember the day I took my first perfect backlit picture but I do remember what inspired me! It was the Photoshop Action Website Florabella. I was so impressed with her images that I bought her actions. There was one photo I was particularly very amazed with. It was a photo of a child spinning in a barn with the sun beaming behind her. The sunlight was so beautiful!  So from then on, I used the sunlight to my advantage! 

So now I want to share a few tips with you that I learned about backlighting. I hope you can take away some knowledge and take pretty backlighting photos of your own!

1. Take Pictures at Sunset

You can take beautiful pictures during this time. You can also take just as beautiful pictures in the early morning when the sun is rising. When the sun is low, the more breathtaking the image! Every season has different sunset/sunrise times so be sure to check the weather channel in your area for the times. 


2. Shoot Towards the Sun

I often point my camera directly toward the sun and get beautiful images from doing so. You'll also want to take into consideration the angle in which you point your camera to. A slight move to the left or right can make or break your image, so use your judgement when clicking the shutter. 

3. Move Your Subject

The placement of your model/subject is also very important. You'll want to place them at the "perfect" angle. Perfect can mean far left, right, centre. You'll have to use your own judgement. 


I hope you have learned a few new things about backlighting and have gotten some inspiration to take pictures of your own! I promise you'll have fun! 


My Top 3 Favourite Photoshop Action Websites

I love Photoshop actions. They cut down your editing time by more than half and can make a significant improvement on your entire image. I have personally bought a couple packages from one of the websites below (you'll find out as you read!), and my experience with them was wonderful. 

If you're looking for some great looking photoshop actions, then read through my list and gain insight on them. Click on their link and explore! 

1. Greater Than Gatsby

Greater than Gatsby offers more than photoshop actions, they offer Lightroom presets, textures and overlays. You can browse through their eight Photoshop Collections, prices varying through $50- 120. They have great collections to choose from but their most popular being The Three Nails and The Innocence Collection.

Their Lightroom Presets offer the same quality. They currently offer two collections, Clean Workflow and Sculpted light. You can purchase it for just $75. They also offer the complete Preset Collection for a discounted price of $100, a $50 savings.

On top of that, Gatsby offers their Textures and Overlays. You can purchase their Photoshop Overlay bundle (Transparent Clouds and Transparent Light) for a discounted price of $40, with a savings of $10.  


2. Florabella

Florabella action sets are dreamy, warm and full of light. When I first came across their website, I was instantly in love! I bought two sets from them (Muse and Classic Workflow). I'm really happy I bought from them because their actions are beautiful and fully customizable. 

You can choose from a wide range of Photoshop actions sets, including their most popular set, Muse. Each set comes with a handful of photoshop actions plus some essential brushes and web and print prep. You can expect to spend between $89 to $135 on varying sets. Florabella also offers bundled discounts to save you money.

In addition, they also have textures and overlays. You can purchase them for between $40-60. 


3. Paint the Moon

Paint the Moon offers one of the most cleanest, luminous and beautifully coloured action sets available. You can see the dedication and hard work that's been put in. Definitely worth a try.

You can expect to pay anywhere between $119-219. It's worth the buy since every set comes with more than 50 actions (or more depending on how many action sets you buy in the collection) 


I hope you liked my top 3 favourite Photoshop Action Websites and can find your favourite. Just hover over each image and click on it and you'll be redirected to their website. Happy exploring!

Prices of Photoshop Actions are based on December 2014 

How to Use Your Flash (External)

This will be a short tip because my knowledge of the external flash unit is not expert enough. However, I figured a way to turn the flash to get the best images. 

 How to go from this .....

The image above used flash incorrectly. 

 To This!

To achieve this look, simply turn your flash at a 45 degree angle, left or right, slightly pointing toward the ceiling. Test out your angles and see what works best, then voila!